uintancæstir
New member
Introduction:
Trouble In Terrorist Town icons are divided into four colors by default:
Blue icons are for weapons.
Green icons for general info. (Avatars, Player Roles)
Red icons for "Passive effect items", "Active use items" and last words said. (Body Armor, Radar, Disguiser)
Gold icons for more details about how a player died. (Props, Bullets, Headshots)
You should now have a 64x64 BGRA8888 format VTF image with 4 flags.
Here are four example icon PNGs:


I hope this guide was helpful.
Trouble In Terrorist Town icons are divided into four colors by default:
Blue icons are for weapons.
Green icons for general info. (Avatars, Player Roles)
Red icons for "Passive effect items", "Active use items" and last words said. (Body Armor, Radar, Disguiser)
Gold icons for more details about how a player died. (Props, Bullets, Headshots)
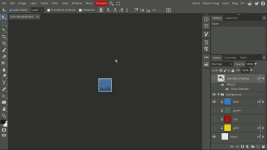
1. Download the "icon_template.zip" from the Trouble In Terrorist Town website.
2. Use a program or website functionally compatible with Photoshop .psd file extensions (In this case it will be Photopea.)
1. While in-game, set all video settings to max. (OPTIONAL)
2. Disable "Antialiasing" in "VIDEO - ADVANCED".
3. Spawn your gun in the White Room on "gm_construct".
4. Use the SPRINT and USE key to rotate with snapping (Some weapons may need additional adjustments.), and use one of the various light sources for your desired result.
5. Right click the weapon to freeze it, then take a screenshot with the Camera.
6. Trim the parts of the background out of the image of your weapon.
7. Save as PNG.

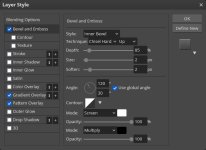
The original icon_template.psd emboss is slightly different than the current one, to correct this:
1. Right click on the "block" layer and select "Blending Options"
2. Select Bevel And Emboss and apply these changes:
Technique: Chisel Hard
Depth: 85
Size: 2
Soften: 2
Screen Opacity: 100
Multiply Opacity: 100
3. Select "Define New"
4. Select "OK"
5. You can also re-save this as "icon_template_updated.psd" (OPTIONAL)

1. Right click on the "example_shading" layer and select "Blending Options"
2. Click "Define New".
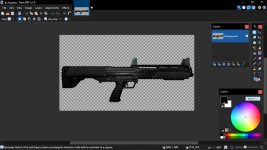
3. Drag your weapon PNG file into your Photopea "icon_template.psd" session.
4. Rotate and scale the uncompressed image to your liking.
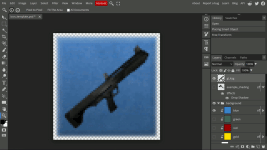
5. Right click on the new weapon layer and select "Blending Options"
6. Select the layer style in the drop-down menu, and click OK.
7. Export as PNG.

1. Re-save the weapon icon as "icon_gl_ksg.vtf" (you can use a VTF file extention plugin.)
Format: BGRA8888
Flags:
Point Sample
No Mipmap
No Level Of Detail
Eight Bit Alpha (Locked)
2. Then using VTFEdit Reloaded (you can also use Notepad++), paste the text below and save as icon_gl_ksg.vmt:
"UnlitGeneric"
{
"$basetexture" "vgui/ttt/icon_gl_ksg"
"$vertexcolor" 1
"$vertexalpha" 1
"$translucent" 1
}
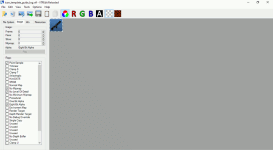

You should now have a 64x64 BGRA8888 format VTF image with 4 flags.
Here are four example icon PNGs:


I hope this guide was helpful.
Last edited:

